How to Clean Keyboard Laptop: Step-by-Step Guide Without Damage
Published: 29 Jun 2025
Keyboards are an essential part of our daily computing routine, whether you’re working from home, gaming, or simply browsing the web. Over time, keyboards can accumulate dust, dirt, crumbs, and even bacteria, making them not only unsightly but potentially unhygienic. Regular keyboard cleaning is crucial to maintain optimal performance and hygiene.
In this guide, we will walk you through the step-by-step process of cleaning your keyboard—whether it’s a desktop, laptop, or mechanical keyboard. We’ll also cover the best tools and techniques to ensure your keyboard looks and works like new, without causing any damage. From simple cleaning methods to deep-cleansing tips, you’ll find everything you need to restore your keyboard to its best condition.
How to Clean a Keyboard Like a Pro
Keeping your keyboard clean isn’t just about looks—it’s about health, performance, and longevity. A clean keyboard not only improves your typing experience but also reduces the buildup of harmful bacteria. Whether it’s a laptop or a separate desktop keyboard, here’s how to clean it effectively and make it feel brand new.
1. Prepare Before You Start
Before jumping into cleaning, it’s important to get your tools ready.
Turn Off Your Device:
Always turn off your laptop or unplug your keyboard. This avoids electrical issues and prevents accidental key presses.
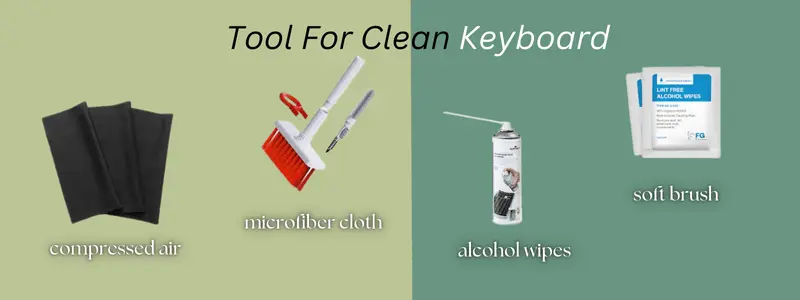
Gather the Right Tools:
You don’t need fancy tools to clean your keyboard, just these essentials:
- Compressed air (to blow out dust and crumbs)
- Microfiber cloth (to wipe the surface)
- Alcohol wipes (to sanitize)
- Soft brush (to clean around and between the keys)
- Cotton swabs (for getting into tight spaces)
If needed, you can also use:
- Vacuum cleaner (to remove heavier debris)
- Keycap puller (for mechanical keyboards)

2. Clear Away Dust and Debris
Before doing a deep clean, you need to remove surface dust and crumbs.
Brush Off Dust:
Use a soft brush or an old toothbrush to gently sweep between the keys. This gets rid of dust you can’t see but that might still be affecting key presses.
Use Compressed Air:
Hold the can upright and spray at a slight angle between the keys. This helps blow out loose dirt and crumbs that gather over time.
| 💡 Tip |
|---|
|
Be gentle when brushing and don’t shake the keyboard too hard, to avoid damaging it. |
3. Wipe and Sanitize Your Keyboard
Now that you’ve removed most of the debris, let’s sanitize and wipe down your keyboard for a deep clean.
Wipe the Keys Individually:
Take your time wiping each key individually. This will remove oils, fingerprints, and dirt that accumulate over time. It’s simple, but makes a big difference in keeping your keyboard fresh.
Clean with Alcohol:
Lightly dampen a microfiber cloth with isopropyl alcohol (70% or higher). Wipe the surface and under each key gently. The alcohol not only cleans but also kills germs.
4. For Stuck Keys or Sticky Surfaces
Sometimes your keyboard needs more than just a surface clean—especially if you spill something.
Wash Keycaps:
Soak the keycaps in warm, soapy water for 15-20 minutes. Gently scrub with a brush, rinse, and leave them to dry completely before putting them back on.
Remove Keycaps (If Possible):
For mechanical keyboards, gently use a keycap puller to remove the keys. Once removed, clean underneath the keycaps with compressed air or a small brush.
Clean Under the Keys:
Use a cotton swab dipped in alcohol to gently clean any grime or sticky residue under the keys.
| Note |
|---|
|
If you’re cleaning a laptop, avoid removing the keys until your model specifically allows it. Instead, focus on how to clean a laptop keyboard without removing keys using safe methods such as brushing and wiping. |

5. Dealing with Spills and Stains
Accidents happen! Here’s how to clean up liquid spills and stains quickly:
Dry Thoroughly:
After blotting, leave your keyboard upside down in a well-ventilated area for 24-48 hours to dry completely. Avoid using hairdryers or heat sources, as they can damage the keyboard.
Turn the Keyboard Upside Down:
If you spill something, immediately flip the keyboard upside down to let the liquid drain out.
Blot Excess Moisture:
Use a dry cloth or paper towel to gently blot the spilled liquid. Don’t rub it, just absorb the moisture.
Check Your Keyboard After Cleaning
Dust and debris can affect key performance. Once you’ve cleaned your keyboard, test it using our keyboard tester to ensure all keys are working smoothly.
6. Simple Steps for Keeping Your Keyboard Clean
To keep your keyboard as clean as possible, make these maintenance steps part of your routine:
Invest in a Keyboard Cover:
A keyboard cover acts as a shield, preventing dust, spills, and stains from settling on your keyboard, so it stays cleaner for longer.
Dust Regularly:
Every week, blow away dust with compressed air or use a soft brush to clear any dirt that might have settled between the keys.
Avoid Eating at Your Desk:
Keep crumbs, food, and liquids away from your keyboard. If you do eat at your desk, consider using a keyboard cover to avoid spills or crumbs.
Practice Good Hand Hygiene:
Wash your hands before using your keyboard to avoid transferring oils and grime onto the keys.
7. Can You Wash a Keyboard?
Most keyboards aren’t designed to be fully submerged in water, but some mechanical keyboards are water-resistant. Always refer to your keyboard’s manual to see if washing is an option.
If your keyboard has removable keycaps, you can wash them separately using warm soapy water. Be sure to dry them thoroughly before reattaching them.
Use a soft-bristled brush or a toothbrush to remove dust from between the keys. To remove particles, gently tilt the keyboard and tap it lightly. A vacuum with a brush attachment set to low pressure possibly be used as an option.
Yes, you can vacuum your keyboard; however, use a vacuum with low suction and a brush attachment. Avoid using a powerful vacuum since it may damage sensitive components. A handheld vacuum made for electronics is a safer option.
Use a soft brush to carefully clean between the keys and a microfiber cloth moistened with isopropyl alcohol to wipe the surface. Turn and softly shake the keyboard to remove any loose debris.
You can use a damp microfiber cloth with a small amount of soapy water to clean the keys. Avoid soaking the cloth, and ensure it’s only slightly damp to prevent moisture from entering the keyboard. Wipe each key gently and dry with a clean cloth.
To clean keyboard caps, first, remove them using a keycap puller if your keyboard allows. Soak the keycaps in warm, soapy water for 15–20 minutes, then gently scrub them with a soft brush to remove grime. Rinse thoroughly, let them dry completely, and reattach them to the keyboard.
The best way to clean a computer keyboard is to start by turning it off or unplugging it. Use compressed air to blow away dust and debris, then wipe the surface with a microfiber cloth dampened with isopropyl alcohol. For deeper cleaning, remove keycaps (if applicable) and clean underneath with a soft brush. Finally, regularly dust the keyboard and keep your hands clean to prevent dirt buildup.
Conclusion
Your keyboard is more than just a tool—it’s a vital part of your daily routine. Whether you’re working, gaming, or chatting with friends, you use it all the time, so keeping it clean is essential for both hygiene and performance. By following these simple steps, you can ensure your keyboard stays in great shape and helps you work or play faster and more efficiently.
Start today—your keyboard will thank you! And if you have any of your own cleaning tips or tricks, feel free to share them in the comments below to help others keep their keyboards clean and functional.

- Be Respectful
- Stay Relevant
- Stay Positive
- True Feedback
- Encourage Discussion
- Avoid Spamming
- No Fake News
- Don't Copy-Paste
- No Personal Attacks

- Be Respectful
- Stay Relevant
- Stay Positive
- True Feedback
- Encourage Discussion
- Avoid Spamming
- No Fake News
- Don't Copy-Paste
- No Personal Attacks


