The Ultimate Guide | How to Capture Screenshots on Your Mac?
Updated: 2, Nov 2024
80
At some point, you’ll need to take a screenshot on your Mac. On a Mac, it’s very easy to take a screenshot, which makes it very simple to record your screen. If you want to save the whole screen, a section of it, or a single window, MacOS has many built-in ways to do it. This guide will teach you how to use the snapping images tool or speed keys that come with your Mac.
To take a screenshot on Mac you can use several effective methods. These methods make it easy to capture exactly what you need on your screen!
1. How to Capture the Entire Screen
This is the quickest method for capturing everything visible on your Mac’s screen.
Step 1:
Press “Command (⌘) + Shift + 3” at the same time.
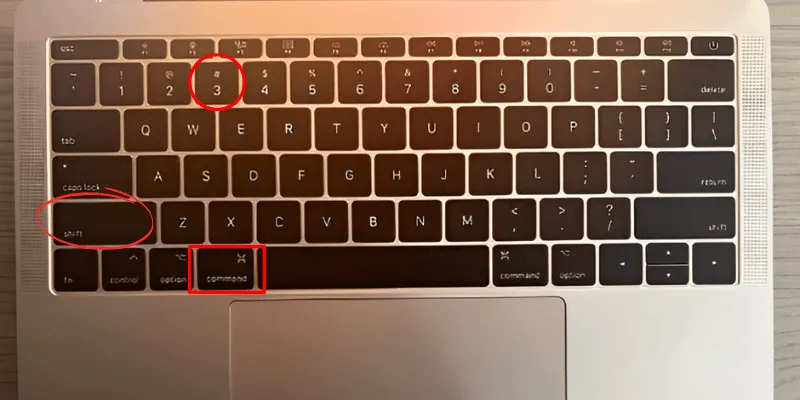
Step 2:
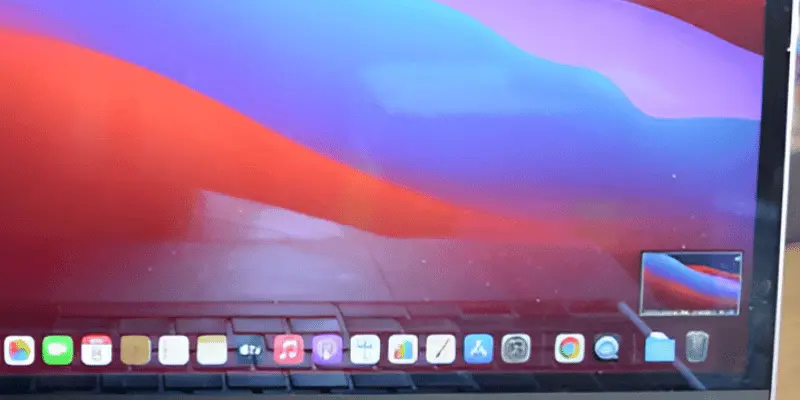
Your entire screen will be captured rapidly.
Step 3:
The screenshot is normally saved on the Mac desktop.
It will be saved as a.png file with the date and time prefixed by default.

2. How to Capture a Partial Area
Want to capture just part of your screen? you can easily do this with a few key commands.
Step 1:
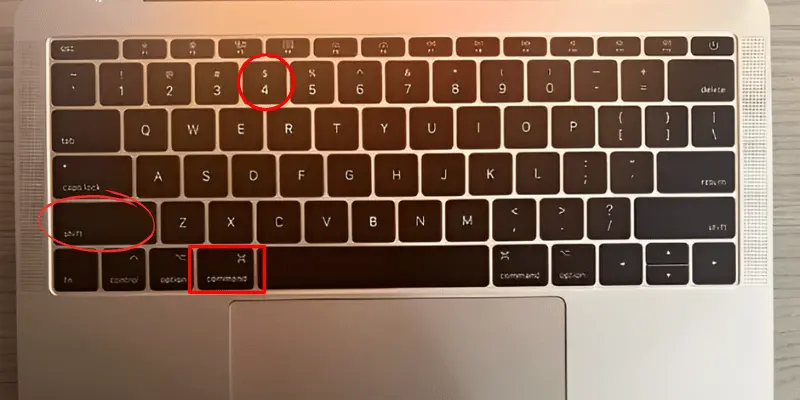
Press “Command (⌘) + Shift + 4” at the same time.
The pointer will then change into a crosshair.
Step 2:
Click and drag to select the area you need to capture, then release the mouse button to take the screenshot.

Step 3:
Your screenshot usually gets saved as a.png file to your desktop.
Also, Read this👇👇👇👇
How to Take a Screenshot on a Computer Laptop
How to Take a Screenshot on a Chromebook
3. Use the Screenshot Menu (macOS Mojave and later)
If you’re using macOS Mojave or newer, you may use the Screenshot toolbar.
Step 1:
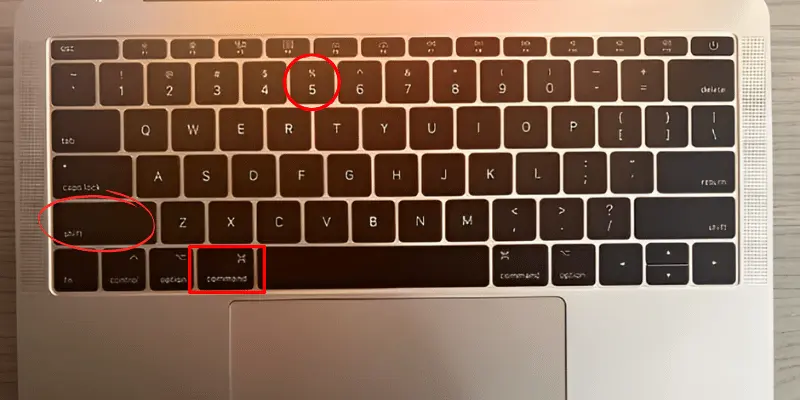
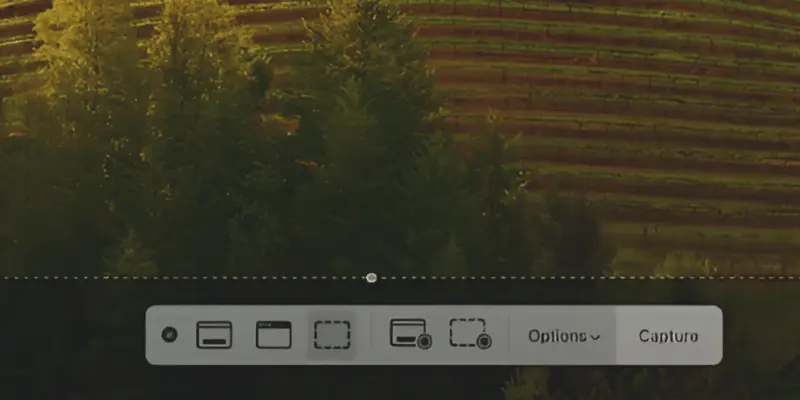
Press “Command (⌘) + Shift + 5” at the same time.
Step 2:
A toolbar will show up at the bottom of the screen, offering choices for capturing the full screen, a single window, or a specific section.
Step 3:
Select your desired option and click “Capture.”
The screenshot will be saved on your desktop.
4. Capture a Specific Window
This option allows you to snap a screenshot of a specific window without a background.
Step 1:
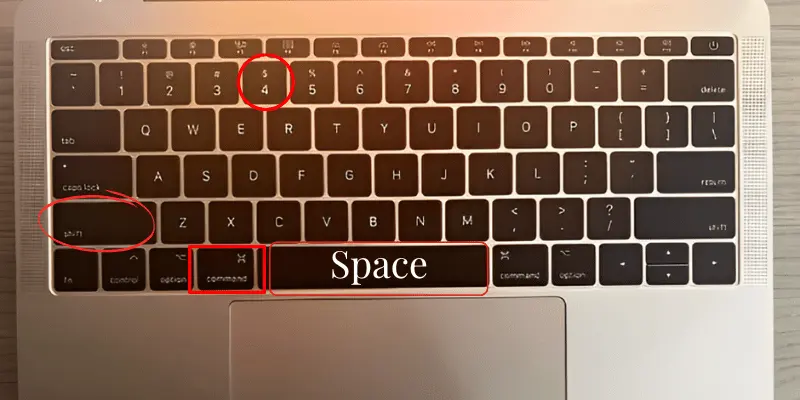
Press “Command (⌘) + Shift + 4” at the same time, then press the “Spacebar”.
The cursor will become a camera icon.
Step 2:
Drag the camera icon across the window you want to capture, and it will be highlighted.
Step 3:
Then click the window to take the screenshot, which will be saved to your desktop.
How to take a screenshot on a mac desktop computer?
Use Shift + Command (⌘) + 3 to capture the entire screen, or Shift + Command + 4 to capture a selected area. After pressing these keys, the snapshot will be saved to your desktop. You can open and edit it as needed.
How to screen record and voiceover on mac?
Open QuickTime Player from your Applications folder and select File > New Screen Recording. To add a voiceover, select a microphone from the recording settings menu. After you’ve finished recording, you can save or share the video.
How to record screen on mac for free?
To record your screen for free, use the built-in QuickTime Player. Navigate to File > New Screen Recording, customize the settings, then press the record button. You can record a portion of the screen or complete screen.
How to screen record on your macbook pro?
To open the recording toolbar in macOS Mojave or later, press Shift + Command + 5. From there, you can choose whether to record the entire screen or a specific section. Click the record button, then stop when you’re finished.
Is there a snip tool on Mac?
Mac does not have a Snip Tool like Windows, although it does provide similar features via shortcuts. Shift + Command + 4 will snip a portion of the screen, while Shift + Command + 5 will provide extra options. These tools are built into macOS and don’t require additional apps.
How do you take a screenshot on a Mac without pressing the buttons?
You can use Siri by saying, “Take a screenshot,” or use a third-party app like Snagit to capture screenshots without using a button. Another alternative is to schedule or automate screenshots with macOS Automator.
Conclusion
On a Mac, taking screenshots is easy and can be done in a number of ways. You can easily take screenshots of all of the screen, specific programs, or chosen areas of your screen if you use computer shortcuts. You can choose where to save the pictures and change the file name.
Please Write Your Comments